How-to install a shower drain in 10 steps
Whether it’s renovation or new construction, linear shower drains are placed in almost every modern bathroom. The installation of a linear shower drain, in particular Easy Drain, is easier than you might think. In this article you´ll find a short explanation about how-to install a linear shower drain in 10 steps.
To achieve the best possible result, please carefully read the installation guide because the exact instructions depend on the type of shower drain. We recommend that the installation should preferably be done by trained professionals in compliance with building regulations.
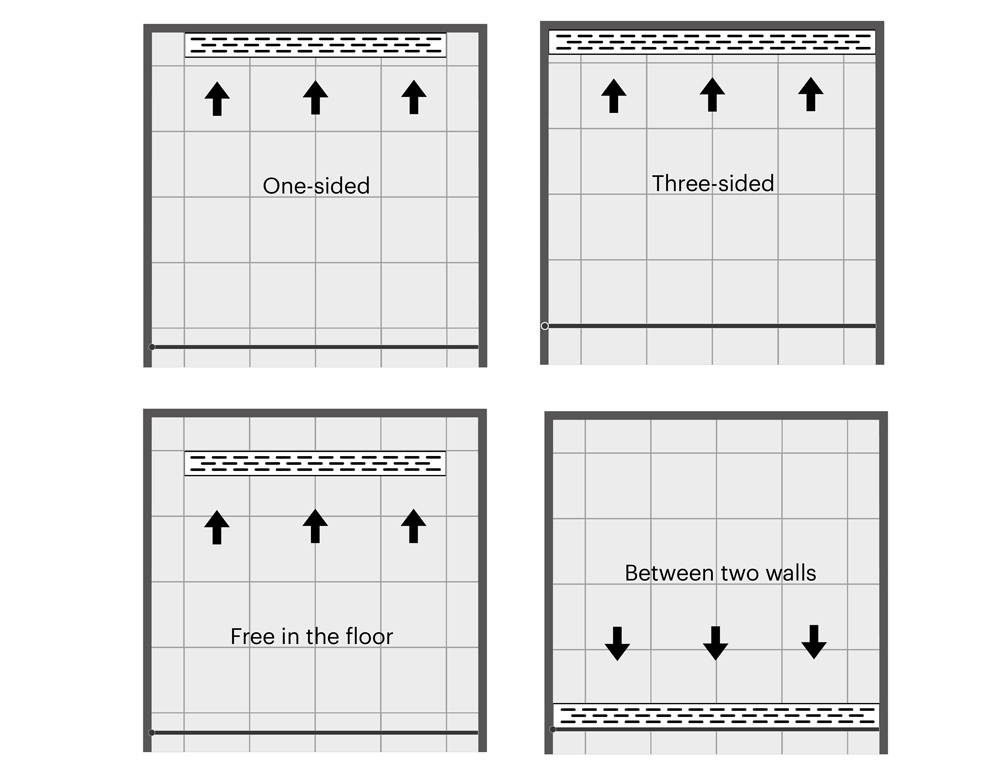
1. Choose the location
A linear shower drain can be installed in 4 different ways, either wall mounted (one-sided or three-sided) or floor mounted (free in the floor or between two walls). Be sure to install the correct shower drain model for that specific location you have in mind. Regardless of where the shower drain is placed, the floors needs to be sloped towards the channel to make sure that all water is drained. When the slope towards the drain is not sufficient or non-existent, water accumulates and causes flooding in the bathroom.
2. Prepare your work area
Before starting the installation process, please check if the floor and work area are clean. Another important thing is to make sure debris or filth cannot get into the shower drain during assembly. You can protect the drain using the (folded) pre-assembled sealing membrane or a cloth. Prior to the assembly, the assembling advice and its special characteristics should be discussed with the tiler. After the assembly, please provide the tiler with the complete assembling advice.
3. Calculate the height of the shower drain
First you need to determine the height of the shower drain. Keep in mind that the tiles should be laid level or 1 mm higher than the top edge of the shower drain, to ensure optimal water drainage. When calculating the total depth, please take into consideration: tile thickness, tile adhesive layer and levelling layer.
Tip: Look at installation depth when selecting the right shower drain for your project

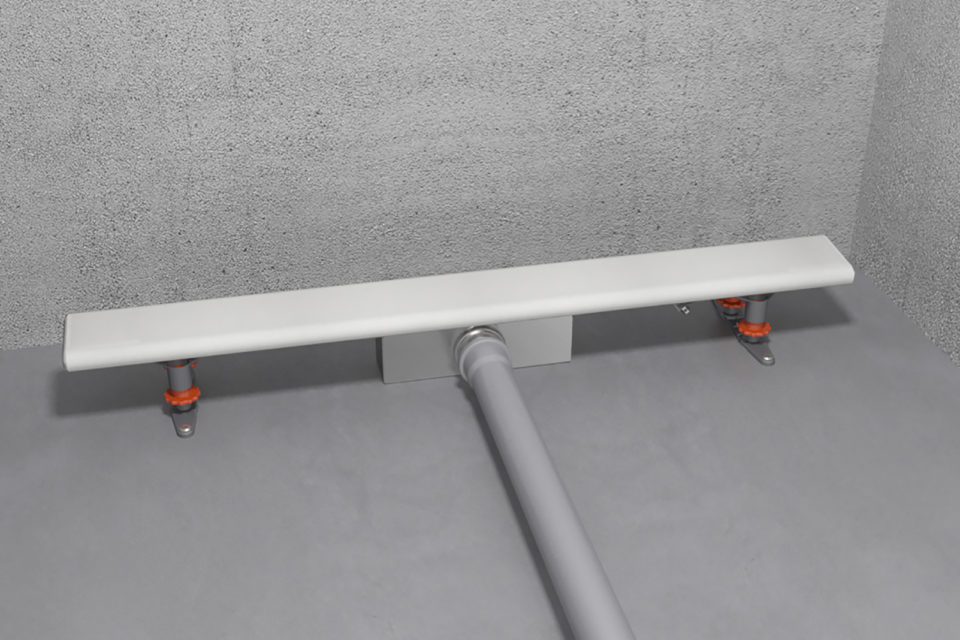
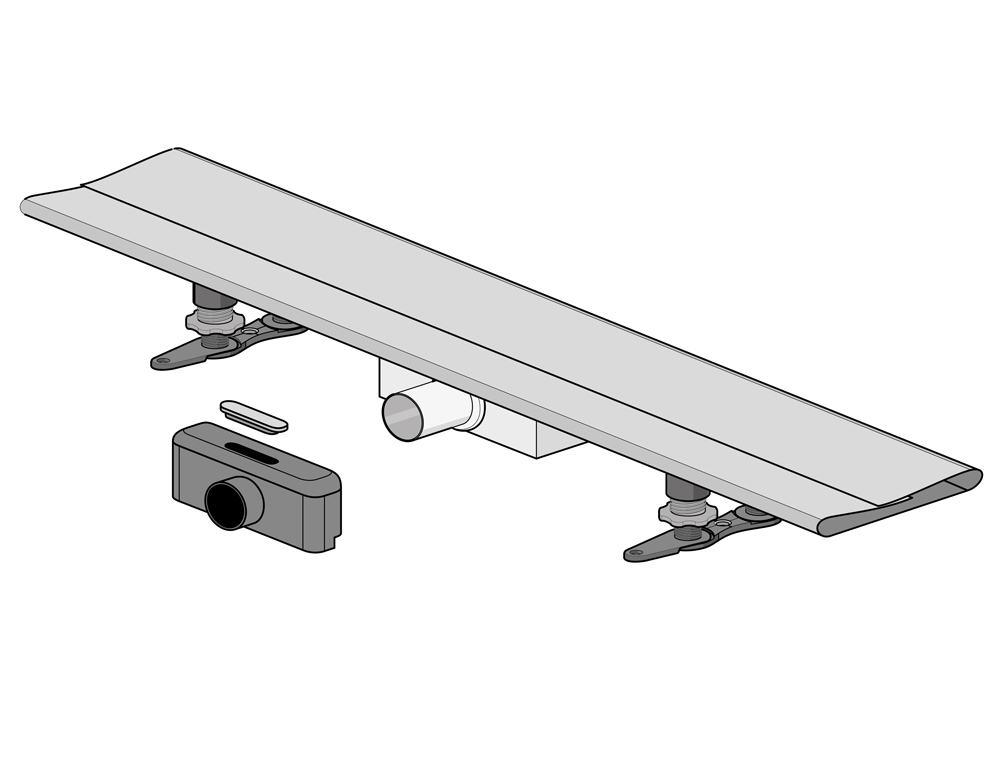
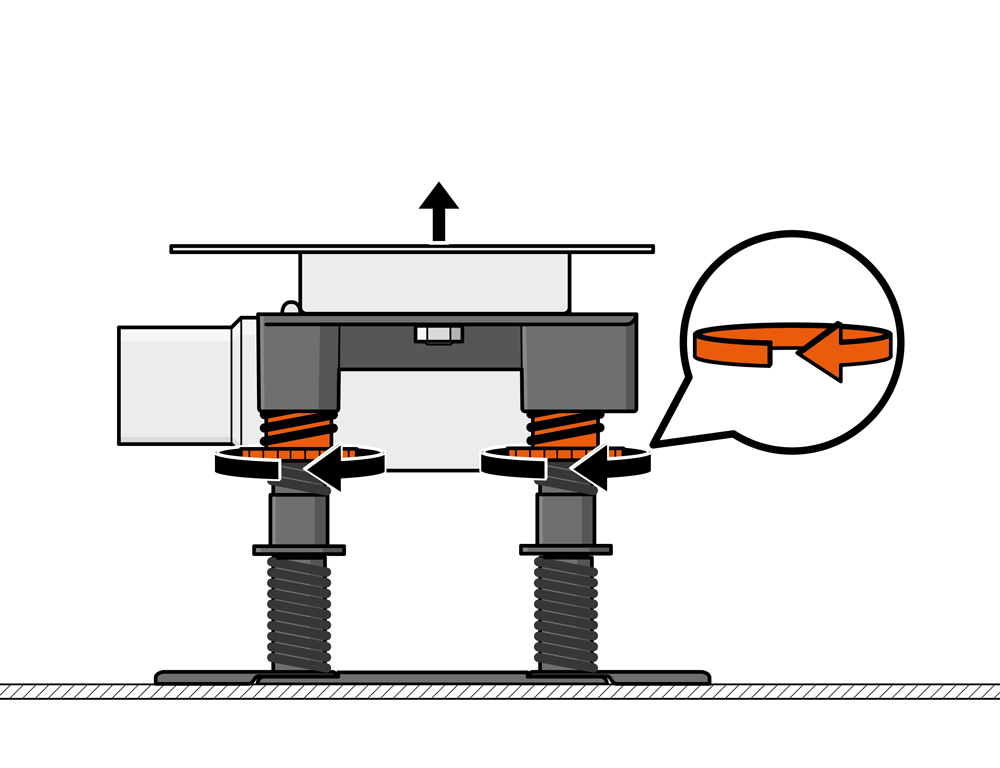
4. Place the built-in set
After creating space for the shower drain, the built-in set needs to be inserted, aligned and levelled. This can be done using the height adjustable legs.
Tip: Wall models come with a special mounting for application against the wall
5. Connect to drainage pipe
We recommend replacing drainage pipes with a diameter less than 50 mm. This may be the case in renovation projects, where a shower tray has been installed. First connect the shower drain to the drainage pipe and make sure that the drainage pipe has a sufficient slope. Slide the drain in the connector, it´s not necessary to glue this, as the connector provides sufficient sealing. Check the watertightness of the shower drain and the connection to the sewer to avoid leaks.
Tip: Mount the earthing on the anchoring clip and provide adequate ventilation for the drainage pipes.

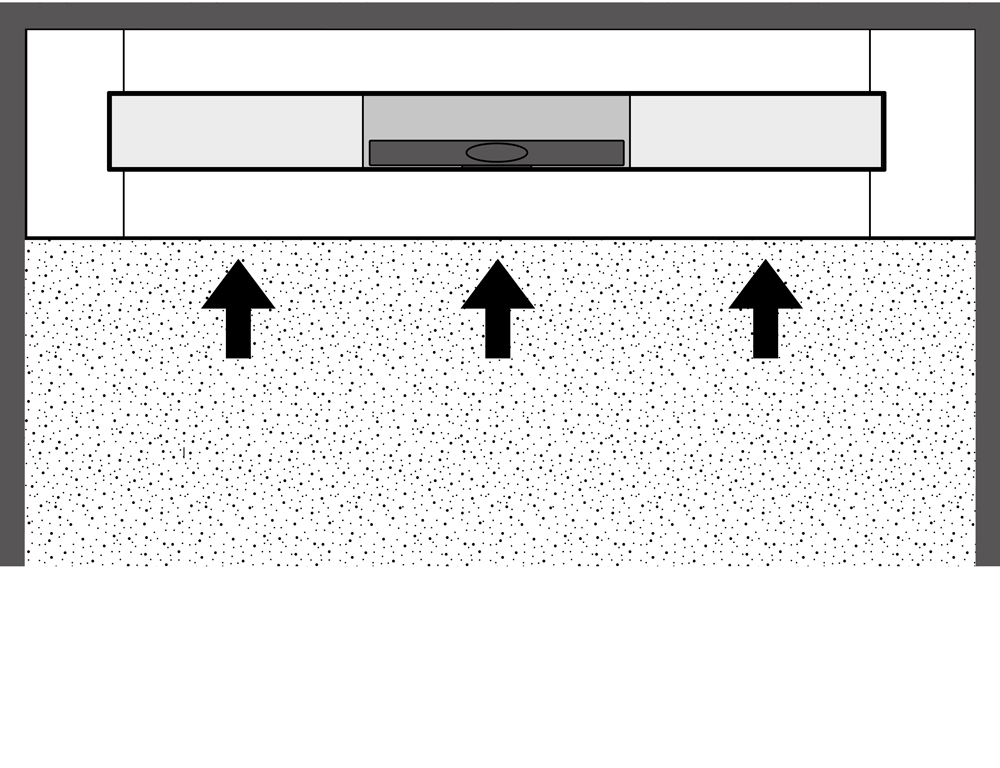
6. Create a sloped floor
Provide an adequate slope to the screed floor to ensure water going towards the shower drain. In order to avoid hollow spaces under the shower drain, make sure that enough material is used and that it connects to the upper edge of the shower drain’s flange.
Tip: Gradient towards the drain needs to be at least 2% per linear meter
7. Watertight installation
As soon as the screed has hardened it’s time to waterproof the shower drain. This can be done using the Water Protection System (WPS). The pre-assembled sealing membrane can be folded out and subsequently glued to the screed using flexible sealing paste like Easy2Seal 2K Rapid, which can be reworked after approx. 90 min!

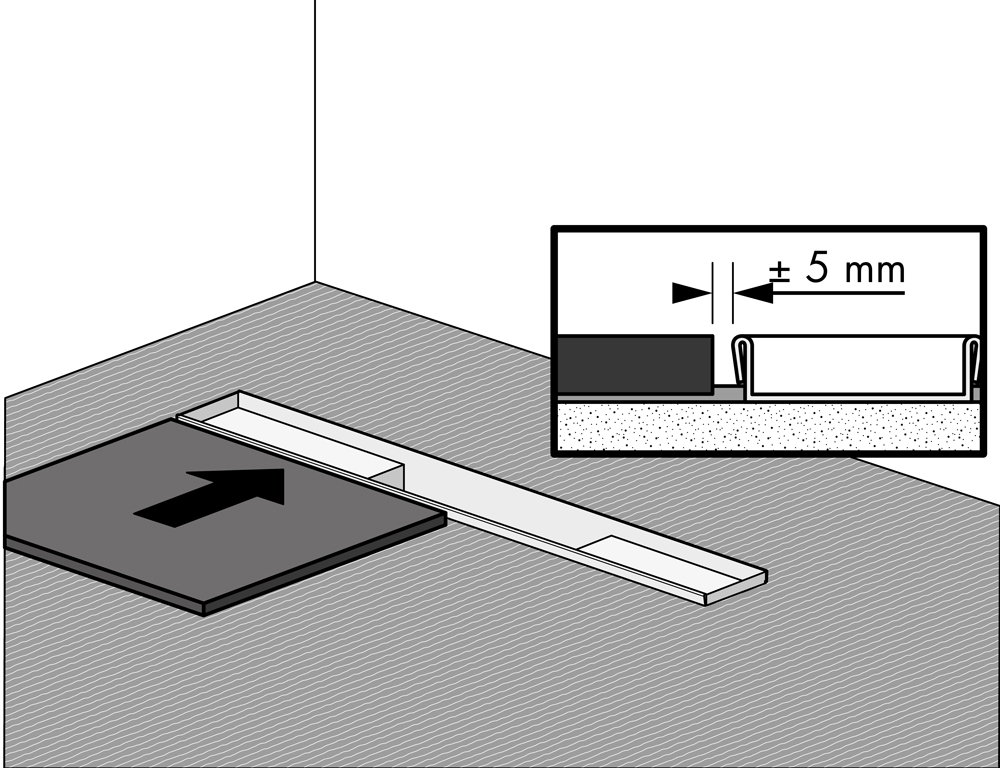
8. Place your bathroom tiles
When tiling, make sure you create a slope with a minimal gradient of 2% towards the shower drain. It is important to ensure that the tiles are not placed directly at the shower drain, about 5 mm needs to remain free in order to apply the elastic sealant.
Tip: use our tile guide to make sure that there’s enough space between the tiles and drain
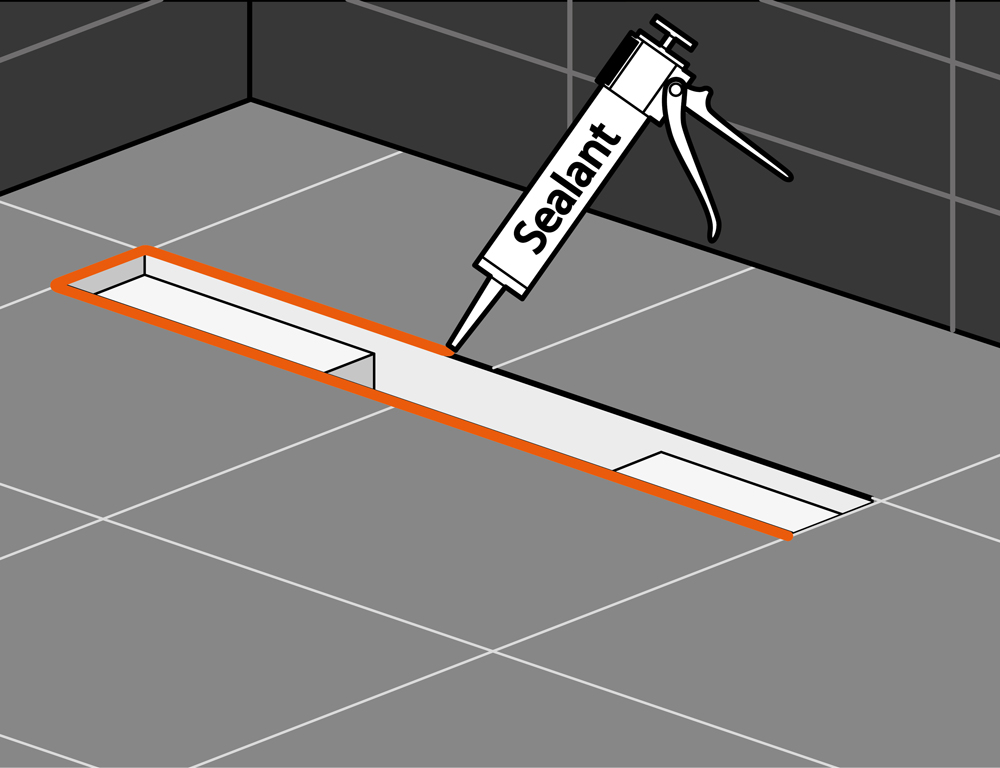
9. Seal the shower drain
After the sealing has dried, the shower drain can be cleaned. After the cleaning process the height adjustable grate can be placed and adapted to tile thickness.
Tip: Easy Drain TAF-models (Tile Adjustable Frame) are fully adjustable at the time of tiling which eliminates guesswork, creates a finished edge, and ensures a perfect fit with any thickness of floor material.
10. Place the grate cover
After the sealing has dried, the shower drain can be cleaned. After the cleaning process the height adjustable grate can be placed and adapted to tile thickness.
Tip: Easy Drain TAF-models (Tile Adjustable Frame) are fully adjustable at the time of tiling which eliminates guesswork, creates a finished edge, and ensures a perfect fit with any thickness of floor material.

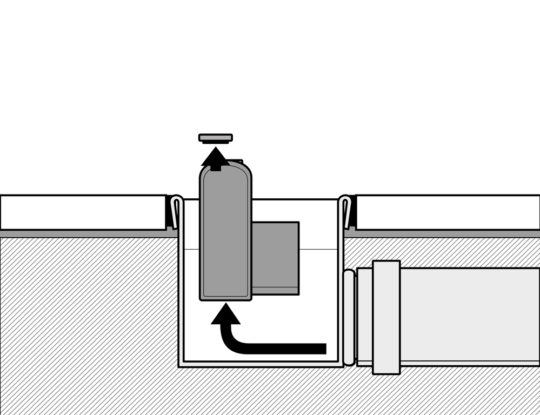
Cleaning and maintenance
The siphon trap should be cleaned periodically to remove any dirt that may have been collected. We recommend the use of the Easy Clean Set for weekly maintenance and cleaning of your shower drain.
Tip: Easy Clean set removes trapped filth and other stains that are hard to remove and gives the drain its shine back.